
The Anatomy of a Perfect #Shelfie: 5 Steps to Styling Shelves You’ll Love

In the age of Instagram, the humble bookshelf has become a canvas for personal expression. The “shelfie”, a beautifully styled shot of your shelves, is a way to share your taste, your passions, and your personality. But how do you go from a cluttered mess to a curated masterpiece? Styling shelves is a balancing act, but it’s one that is easy to master.
Here are our five steps to a shelfie you’ll be proud of.
Step 1: Start with a Clean Slate
First things first: take everything off. Everything. Give your shelves a good clean. This blank canvas approach allows you to be intentional about what you put back. It forces you to handle every object and ask, “Do I truly love this?”

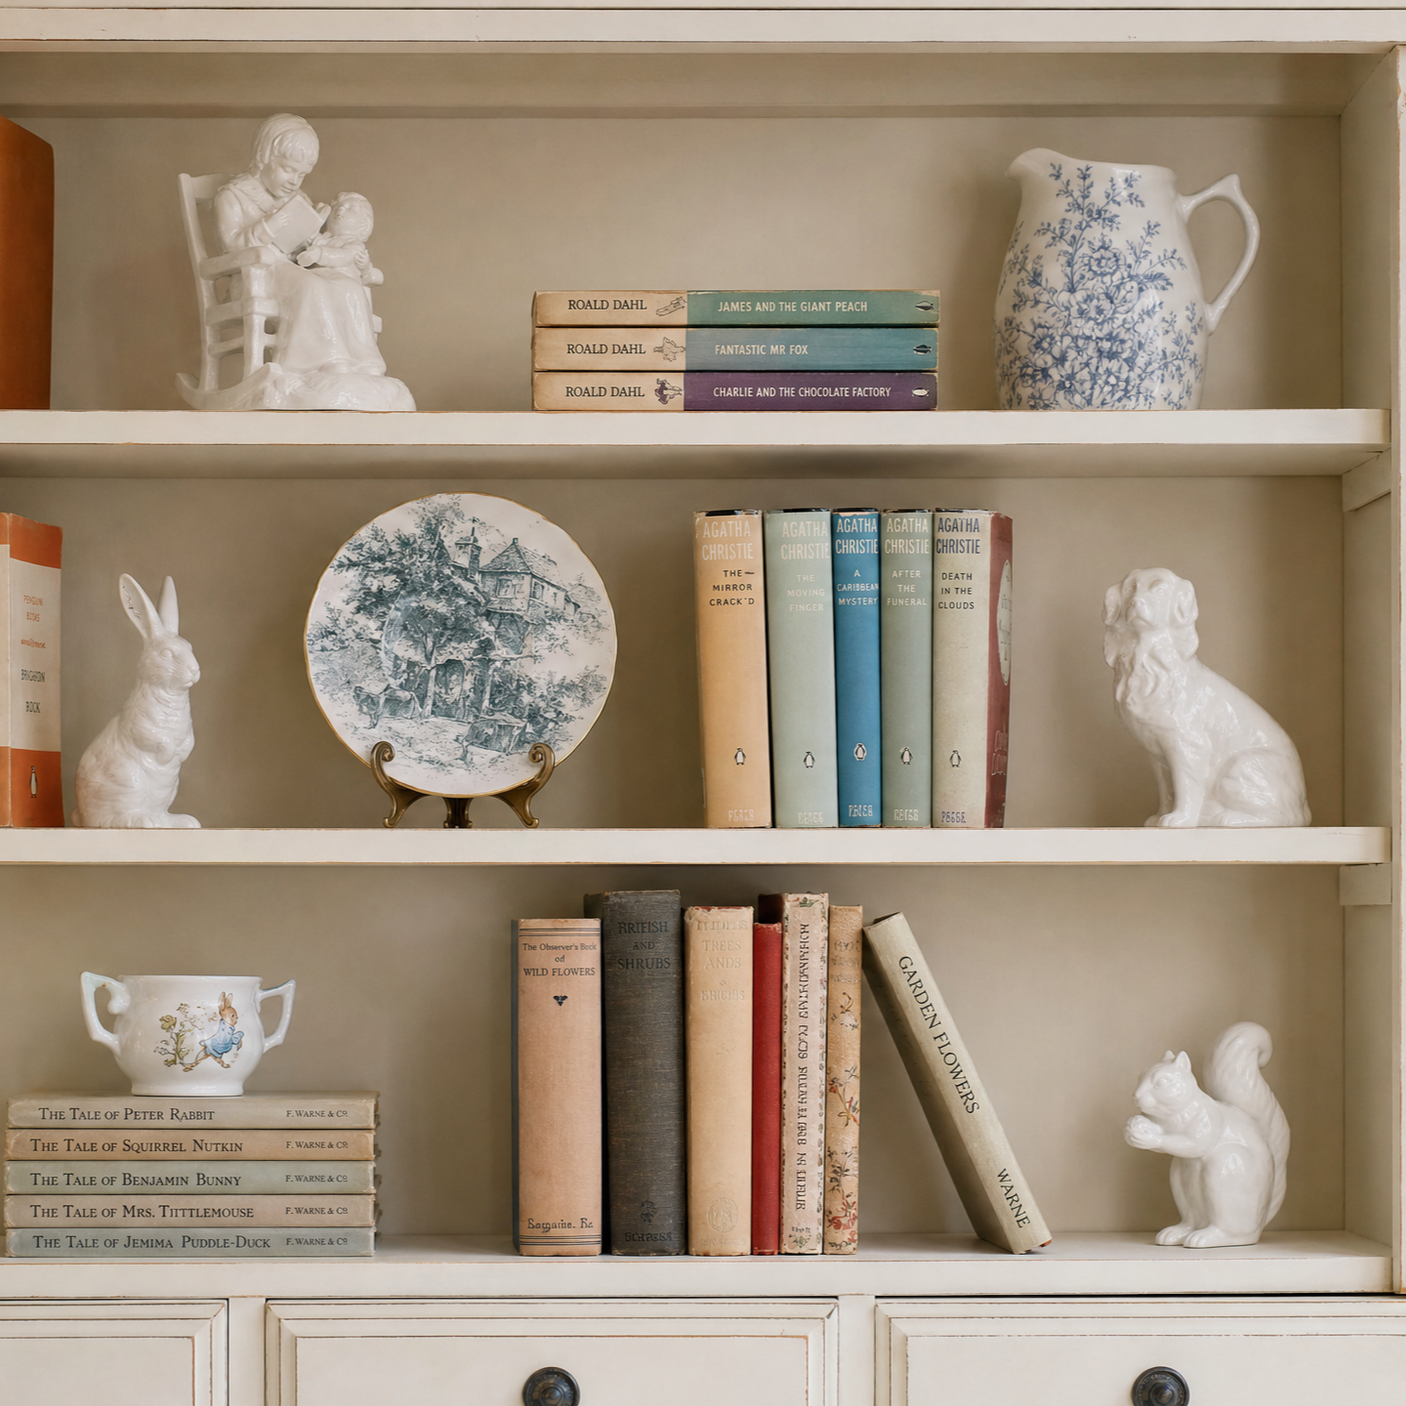
Step 2: Anchor with Books
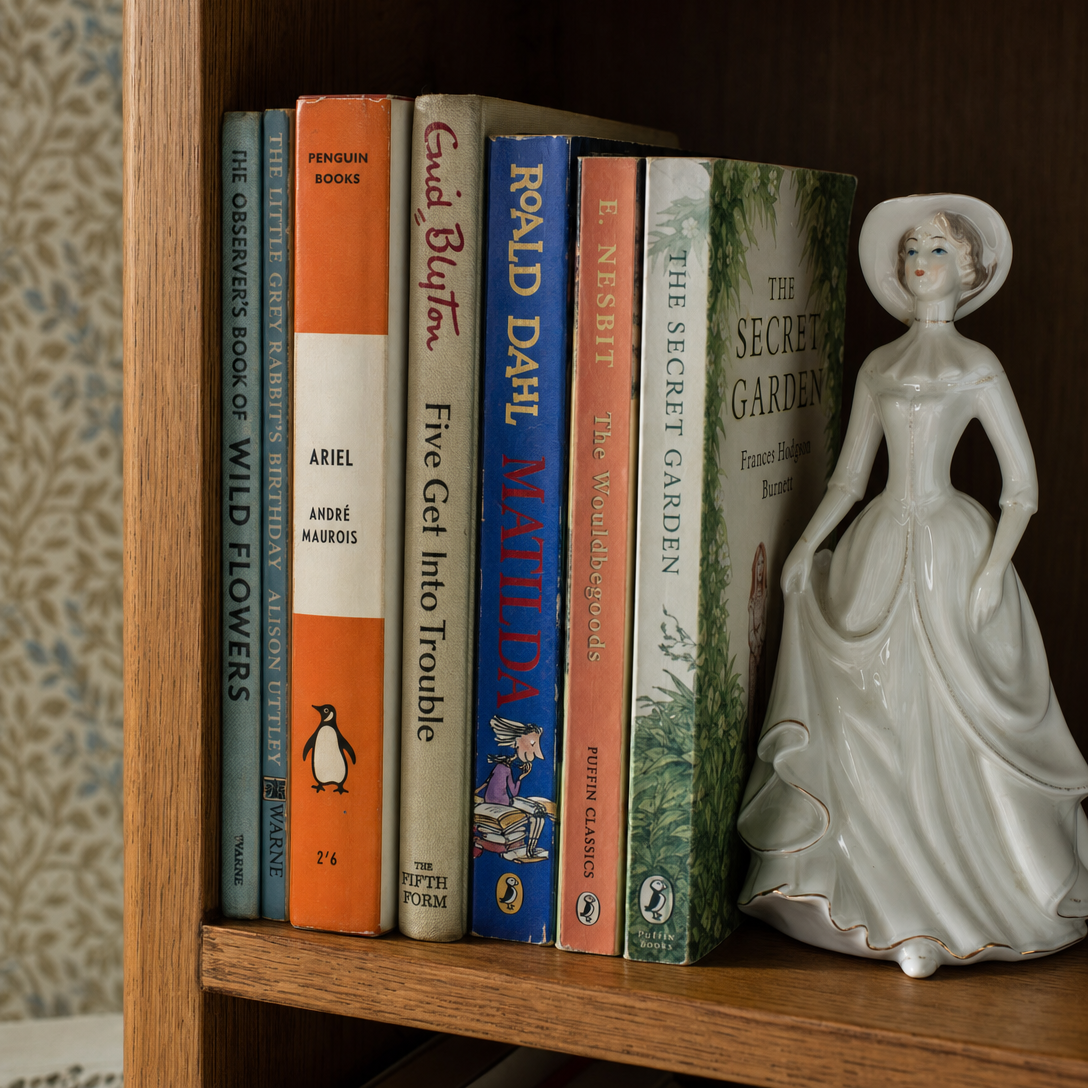
Books are the backbone of any good shelf.
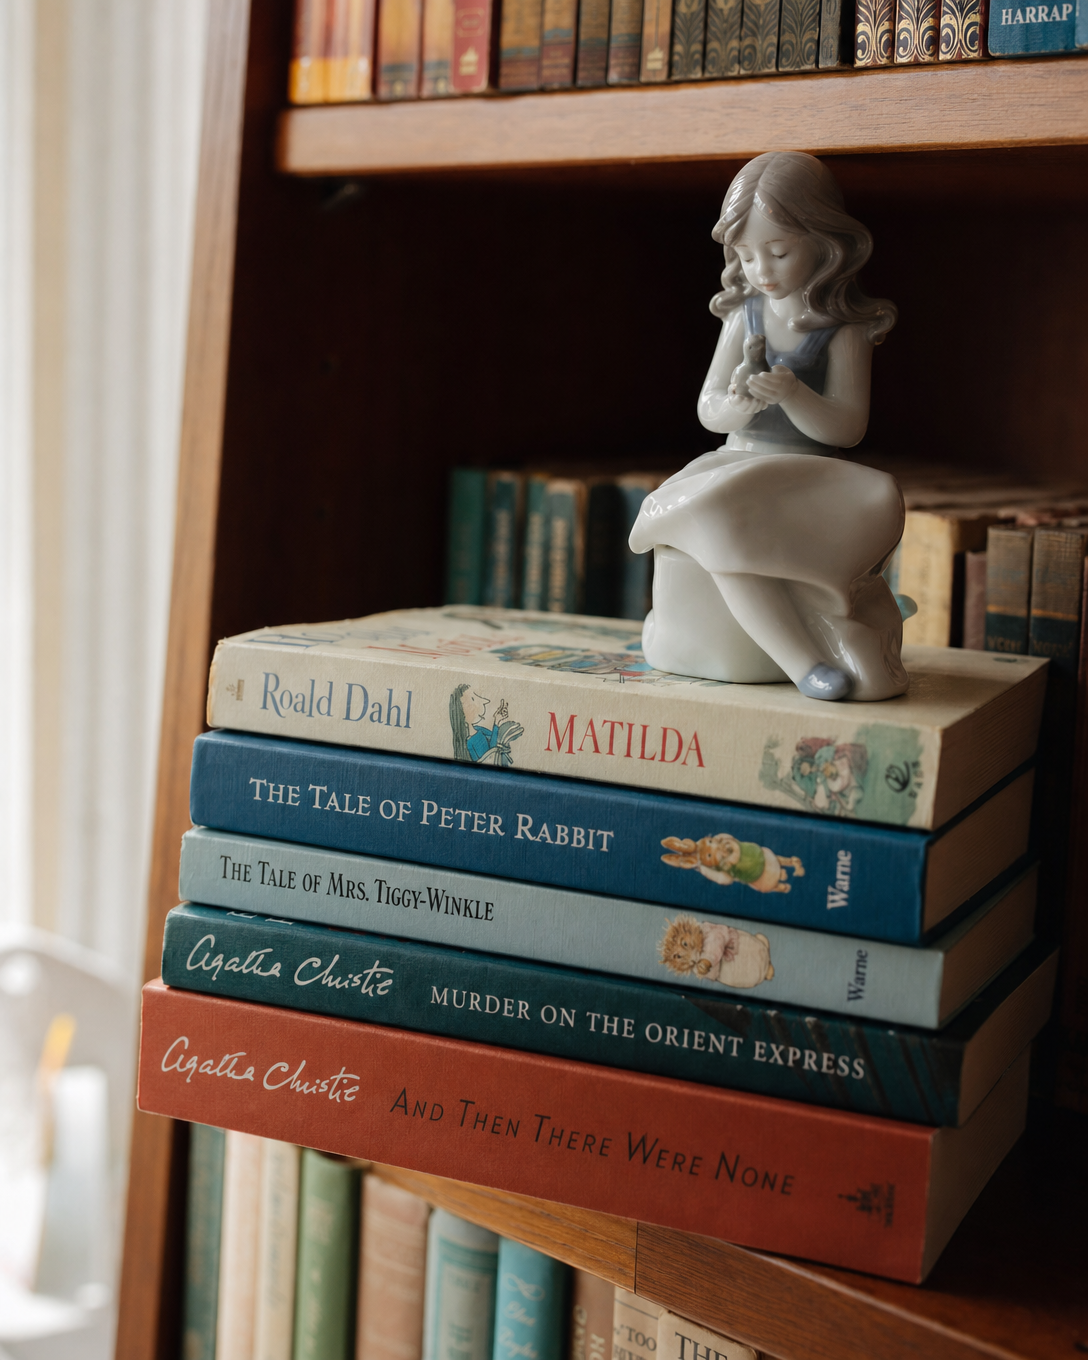
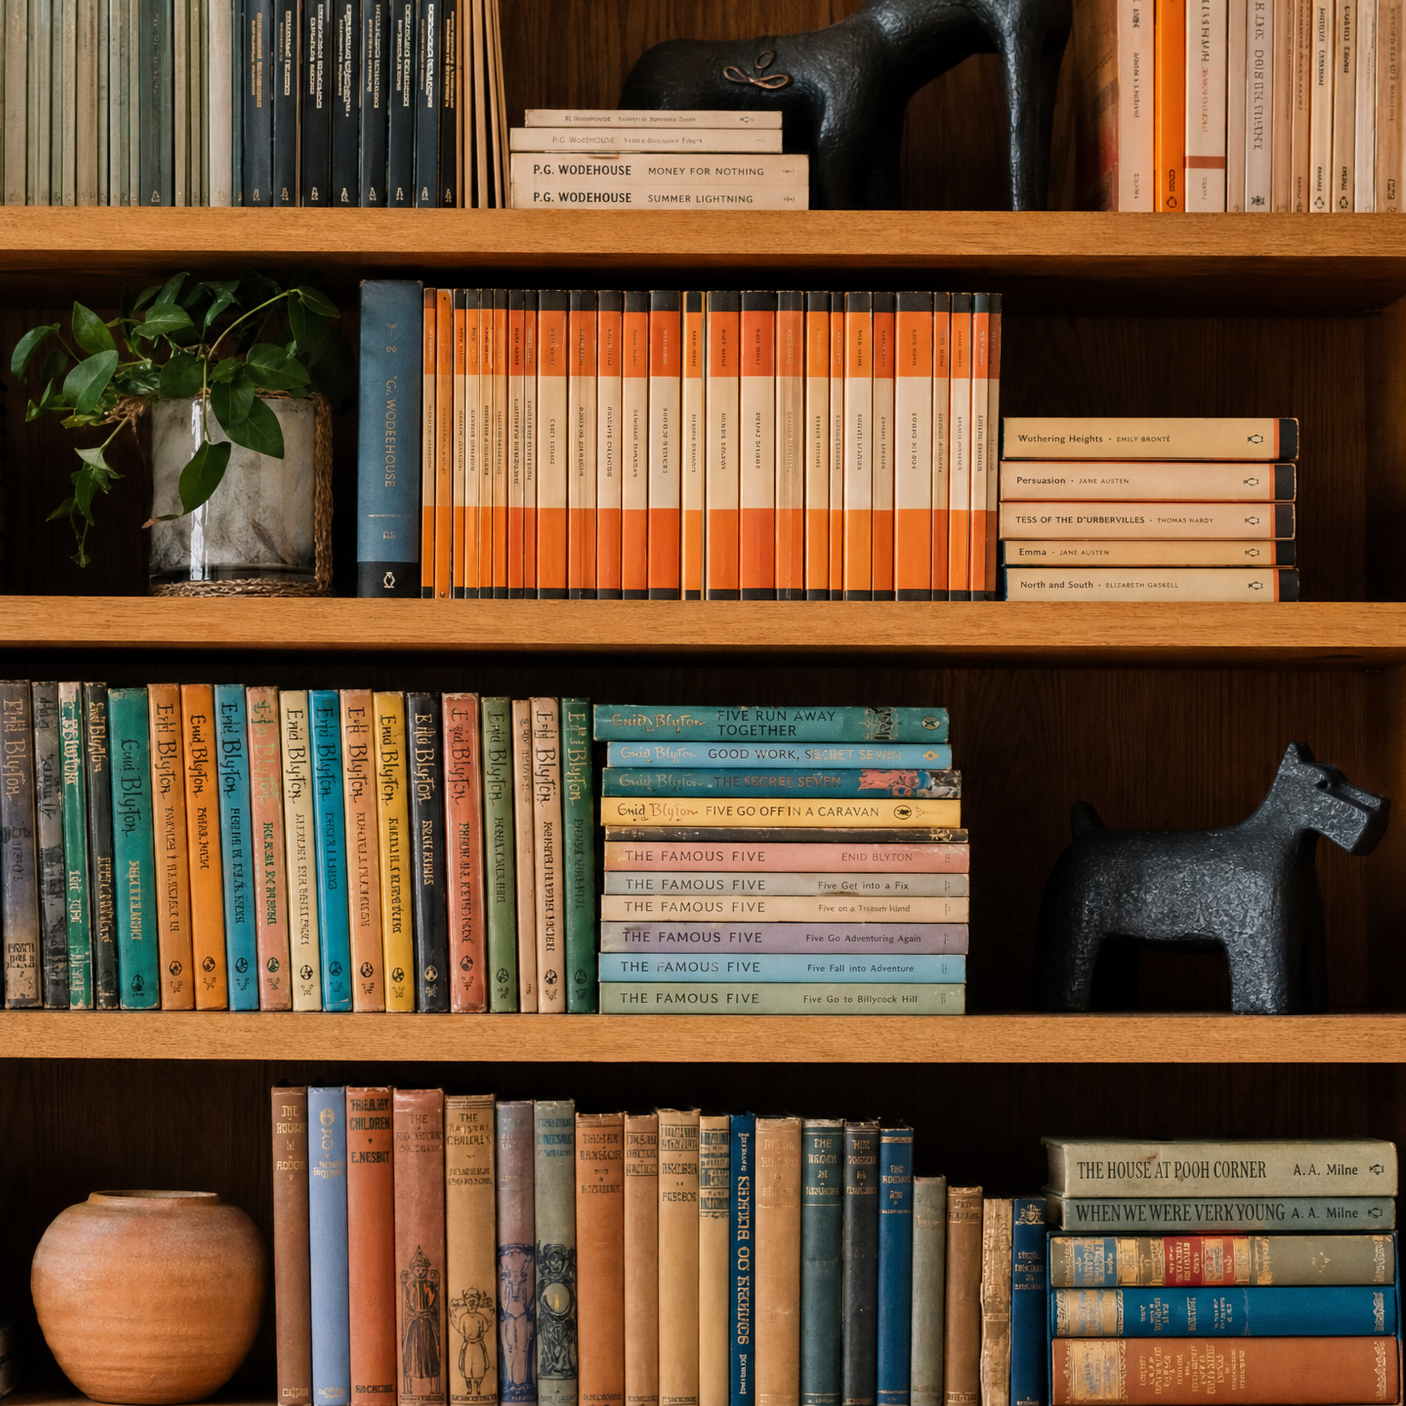
Vary the Orientation: Don’t just line them all up vertically. Stack some horizontally to create platforms for smaller objects. This variation in height and direction creates instant visual interest.
Group by Colour (or Don’t): Grouping books by colour can create a bold, graphic statement. If that’s not your style, focus on mixing sizes and textures for a more organic, library feel.
Read this article from House & Garden about how to arrange books in a bookshelf.
Bonita Eloise curated a bespoke collection of vintage Enid Blyton books here, that will capture children's imaginations and evoke a deep nostalgia in adults.
Step 3: Add Objects with Meaning (The “Story” Layer)
Now for the fun part. This is where you add your personality. Choose objects that have a story.
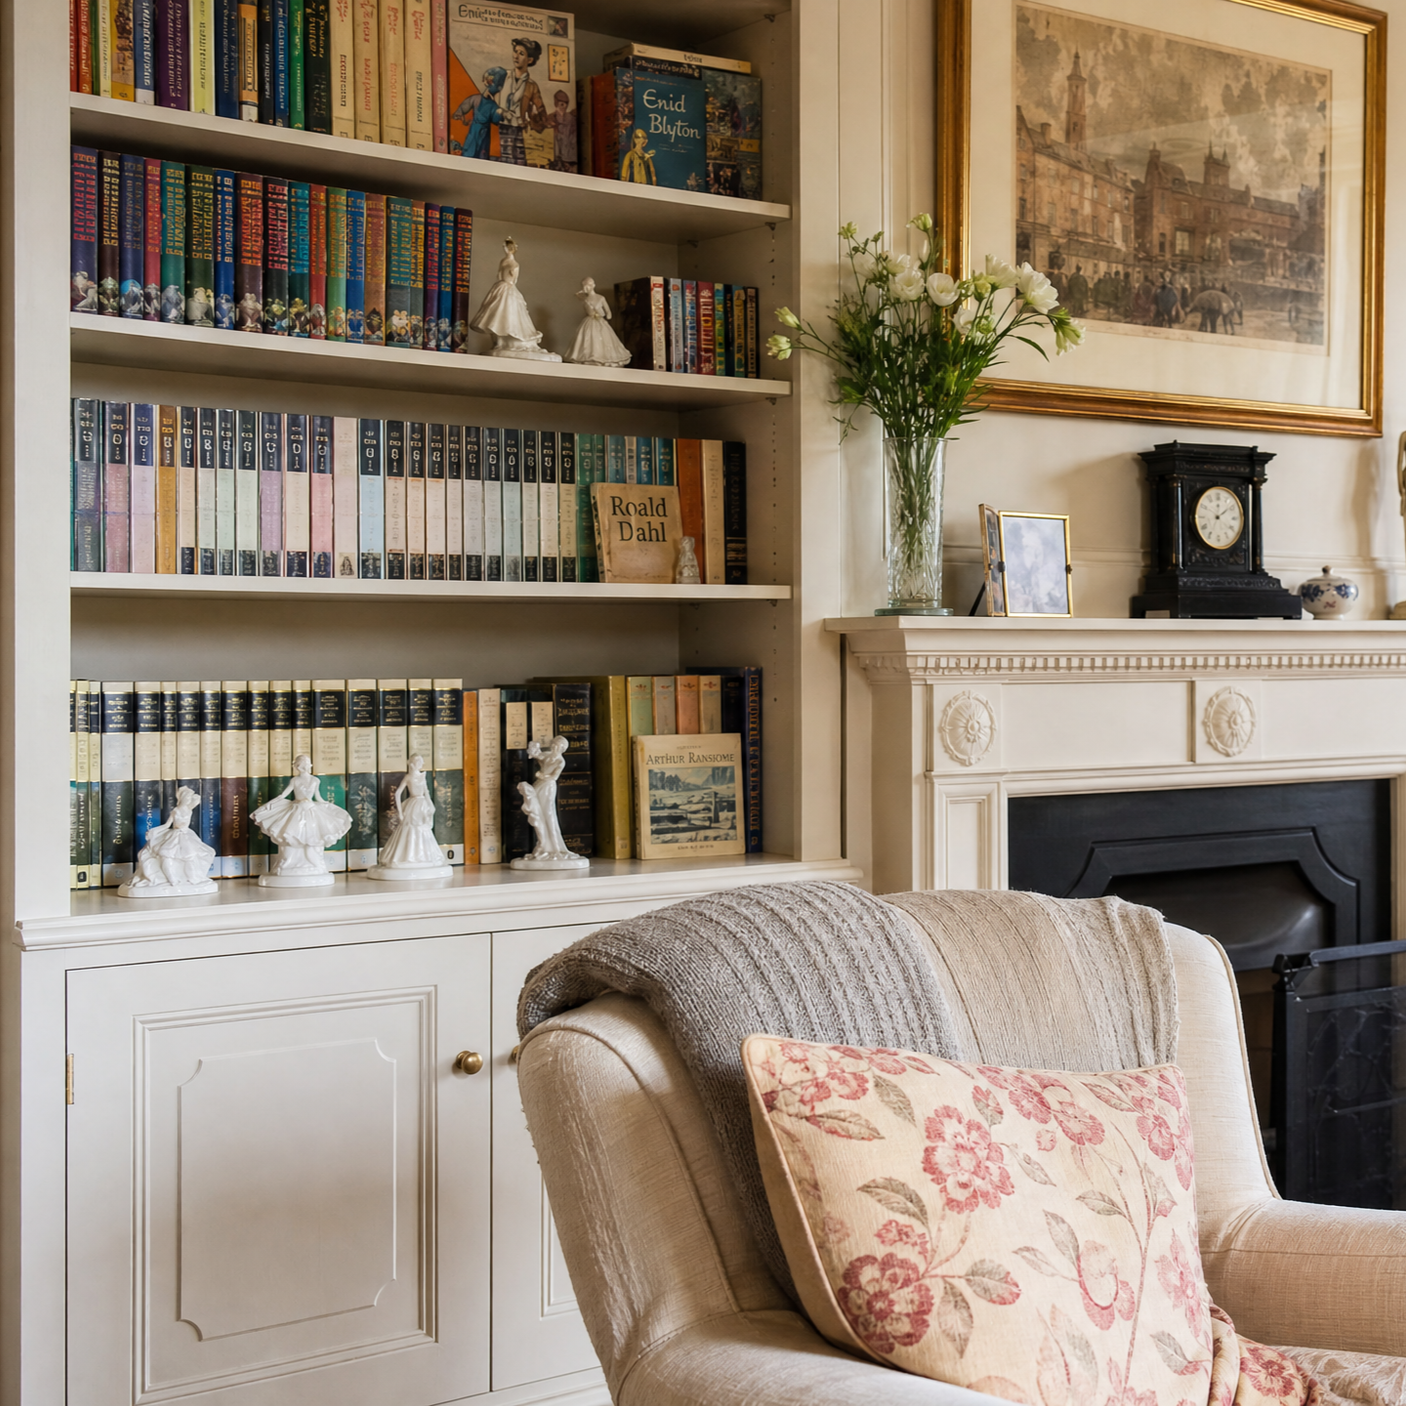
What to add: A beautiful vintage vase, a framed photo, a piece of pottery you picked up on holiday, a decorative bowl, a quirky figurine.
The Rule of Three: Group smaller objects in odd numbers, particularly threes. A small vase, a candle, and a tiny brass object, for example, will look more balanced and appealing than just two items.
Vogue magazine offers advice on styling bookshelves with books and complementary décor in this edition.

Step 4: Play with Height and Depth
A common mistake is to line everything up in a single row. Create a more dynamic look by playing with height and depth.
Create Layers: Place taller items at the back and shorter items at the front. Lean a small piece of art or a framed postcard against the back of the shelf.
Use Your Book Stacks: Use your horizontal book stacks as pedestals to give smaller objects more height and importance.
Homes & Gardens illustrates stylish ways designers are displaying their books in this article.

Step 5: Step Back and Edit
Styling is a process of addition and subtraction. Once you think you are done, step back. Take a photo. Does it feel balanced? Is there enough “breathing room” around your objects, or does it feel cluttered? Don’t be afraid to take one or two things away. Often, less is more. The negative space is just as important as the objects themselves.
The Telegraph newspaper shows ways to curate collections for maximum impact.
Your shelves are a three-dimensional scrapbook of your life. They should be a reflection of your past, your present, and your passions. By styling them with intention and personality, you can turn a simple storage space into a beautiful and meaningful focal point in your home.